Caddy webserver is a modern, open-source web server with automatic HTTPS written
in Go. It is designed to be easy to use and configure, making it an excellent
choice for hosting websites and web applications. In this guide, we will show you
how to install and configure Caddy on your server. You can download the latest
version of Caddy from the official GitHub page.
Step 1: Install Required Packages
Before installing Caddy, you need to install the required packages on your server.
You can install the packages with the following commands:
For Debian/Ubuntu:
sudo apt updatesudo apt install -y curl wget tar jq
For CentOS/RHEL:
sudo yum updatesudo yum install -y curl wget tar jq
For Arch Linux:
sudo pacman -Syyusudo pacman -S curl wget tar jq
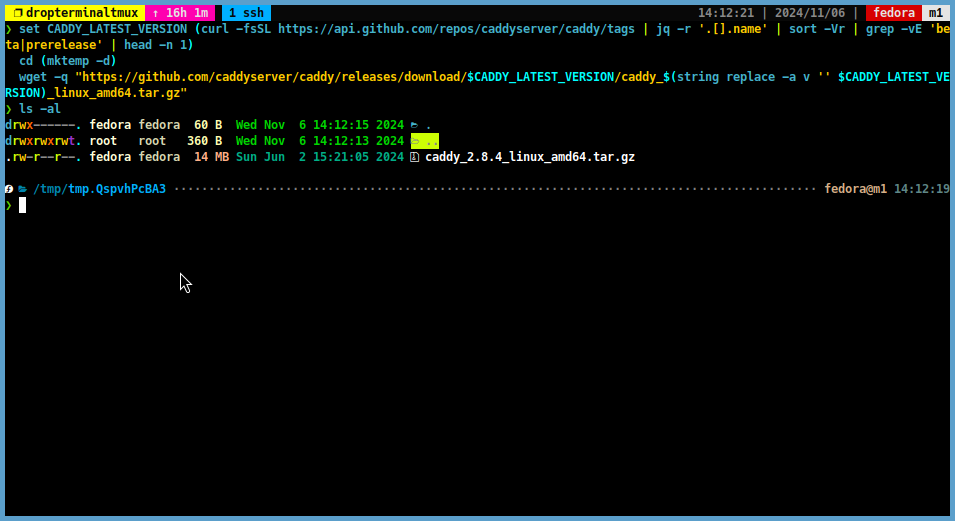
Step 2: Download Caddy Tarball
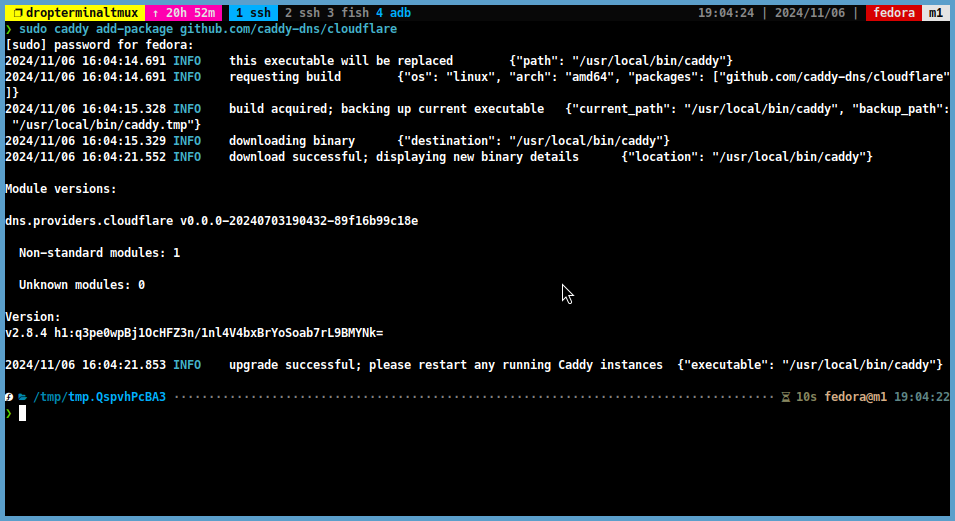
I prefer to download Caddy as a binary because it supports adding custom Caddy
extensions. If you install the latest version. You can download the latest version
of Caddy with the following command.
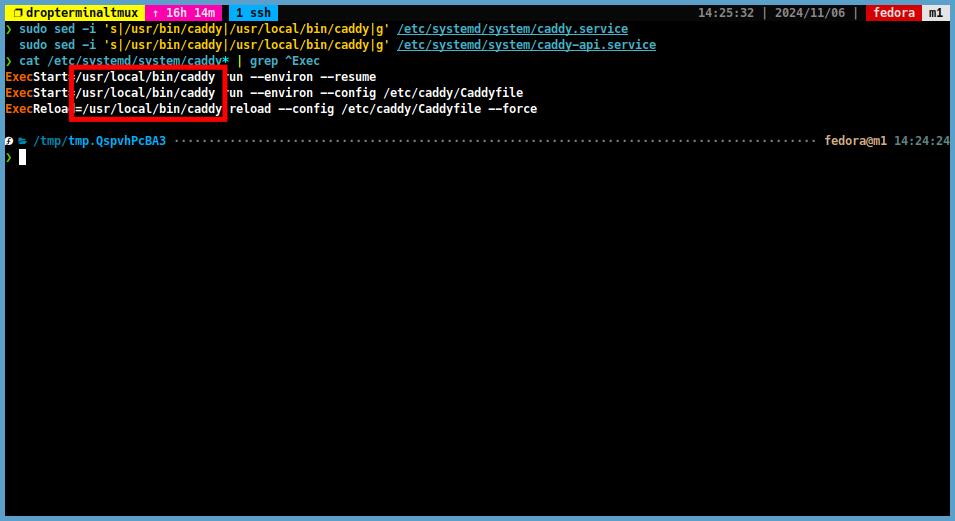
Step 6: Change Default Binary Path in Caddy Service Files
We have installed the Caddy binary into the /usr/local/bin directory. You need
to change the path in the Caddy service files to point to the correct location.
Open the service files with the following command:
sudo sed -i 's|/usr/bin/caddy|/usr/local/bin/caddy|g' /etc/systemd/system/caddy.servicesudo sed -i 's|/usr/bin/caddy|/usr/local/bin/caddy|g' /etc/systemd/system/caddy-api.service
To verify the changes, you can use the following command:
cat /etc/systemd/system/caddy* | grep ^Exec
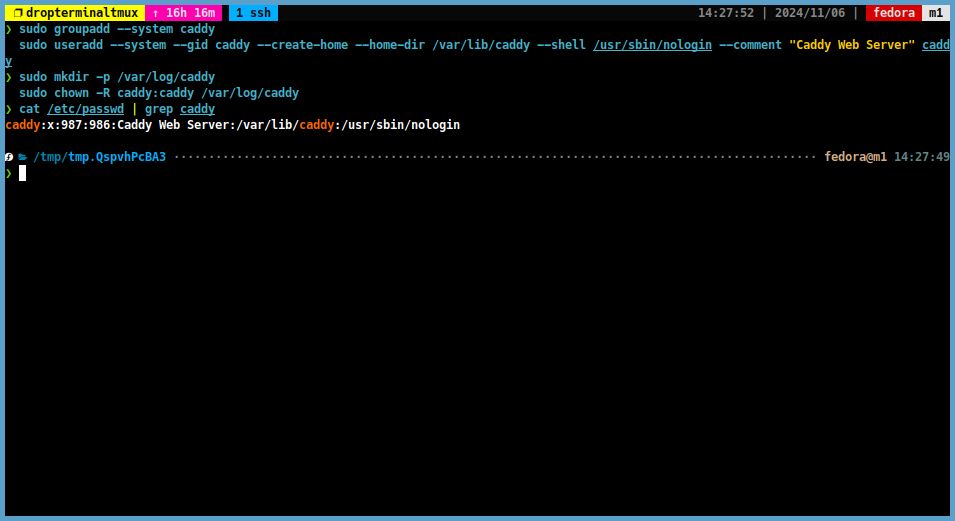
Step 7: Create Caddy User, Group and Log Files Directory
To run Caddy securely, you need to create a special user and group for Caddy.
You can create a Caddy user and group with the following commands:
Use the following command to create a Caddy configuration file in the /etc/caddy
directory:
sudo mkdir -p /etc/caddysudo vim /etc/caddy/Caddyfile
I prefer to use the following configuration file for Caddy:
{# http_port 8080 # HTTP port (default is 80)# https_port 8443 # HTTPS port (default is 443)# default_bind <IP> # Default IP to bind to (default is all interfaces)}# for logging(logger) { log { output file /var/log/caddy/{args[0]}.access.log format json { time_format wall time_local } } }# for php websites (requires php-fpm)(php-fpm) { php_fastcgi unix//run/php-fpm/www.sock { index index.php header_up remote_addr {remote} header_up remote_addr "^([^:]+):.*$" "$1" header_up X-Forwarded-For {remote} header_up X-Forwarded-For "^([^:]+):.*$" "$1" try_files {path} {path}/index.php =404 } handle_errors { php_fastcgi unix//run/php-fpm/www.sock { try_files /customerror.php replace_status {err.status_code} } }}# for certificates (cloudflare example)(tls-cloudflare) { tls { dns cloudflare {file.{$CREDENTIALS_DIRECTORY}/cfapitoken} resolvers 1.1.1.1 }}# for directly connections like http://serverip:80:80 :443 { import logger server-main respond "Hello, World!"}
If you have configured a domain and DNS settings, you can append the following
configuration to the Caddyfile:
yourdomain.com { import logger yourdomain import tls-cloudflare # if you are not using Cloudflare, you can remove this line root * /var/www/yourdomain.com file_server}
Note
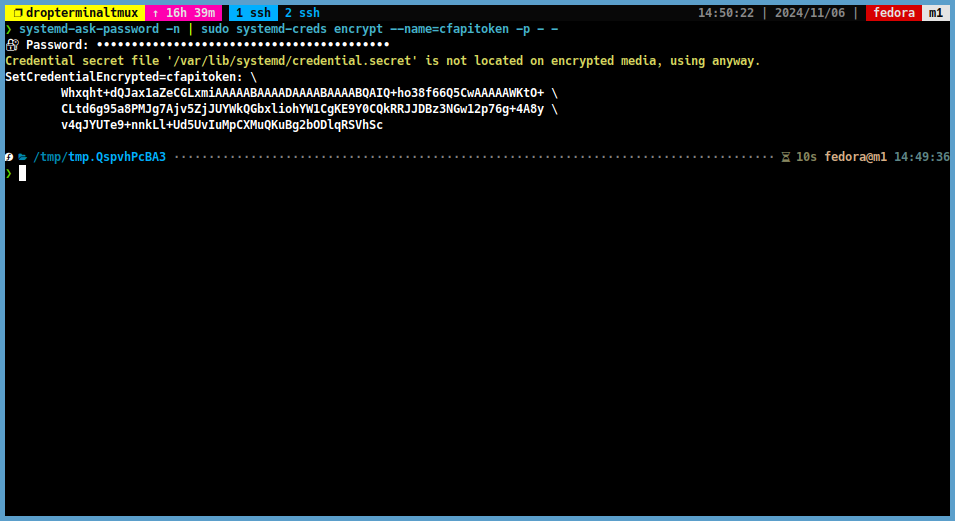
If you are using Cloudflare, you will need to create a Cloudflare API token
and store it with systemd creds. You can create
a Cloudflare API token by following their official documentation.
After creating the API token, you can save it using the following command:
Congratulations! You have successfully installed and configured Caddy on your
server. You are now ready to host websites and web applications with Caddy.