Introduction
- GeoIP filtering is a security technique that controls access to a website, server or online resource based on the geographical location of the incoming IP address. This method is often used to restrict access from certain countries or regions associated with high levels of suspicious or malicious activity, such as spam, hacking attempts or unauthorised access.
- Today I’m going to explain how to set up GeoIP filtering with Caddy and FirewallD.
- I’ve explained how to set up Caddy in my previous articles: [[sysadmin/caddyserver_setup| Setting Up Caddy Web Server]], [[security/caddyserver_auth_setup|Authentication with Caddy Web Server]]
Step 1: Select a GeoIP Database for Caddy
-
I prefer the GeoLite2 database for Caddy. If you have a Maxmind membership you can use it too. If you don’t have a Maxmind membership, you can download the GeoLite2 database from the following link: https://github.com/P3TERX/GeoLite.mmdb
Information
This database is updated every 3 days.
-
Copy the
GeoLite2-country.mmdbURL from the releases page and download theGeoLite2-country.mmdbfile to your server.sudo wget -O /etc/caddy/GeoLite2-Country.mmdb <copied_url>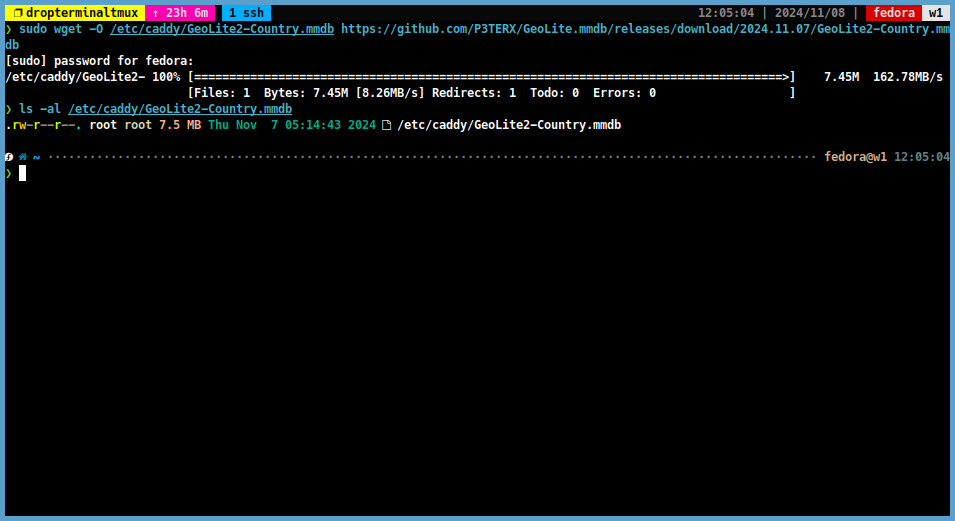
Step 2: Install maxmind_geolocation Plugin for Caddy
-
To use the maxmind geolocation module with Caddy, you need to download the module with the following command:
sudo caddy add-package github.com/porech/caddy-maxmind-geolocation
Step 3: Set Up Caddy for GeoIP Filtering
-
Open the
Caddyfilewith your preferred text editor.sudo vim /etc/caddy/Caddyfile -
Add the following lines to the
Caddyfile:(geofilter) { import /etc/caddy/Geofilter }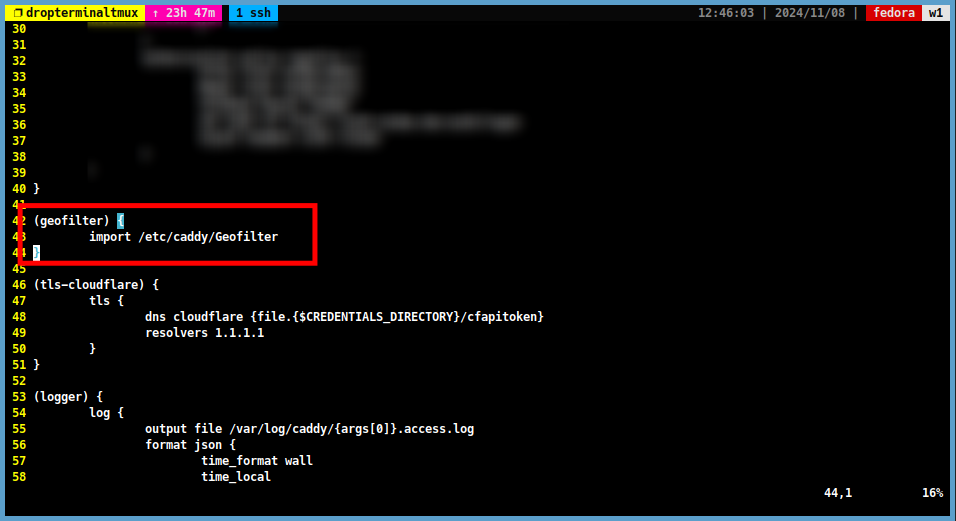
-
Create a new file named
Geofilterin the/etc/caddydirectory.sudo vim /etc/caddy/Geofilter -
Then add the countries you want to allow to the
Geofilterfile. We do not want to block requests from local addresses. So we add local addresses to the Geofilter file as shown below. For example:@geofilter { not maxmind_geolocation { db_path "/etc/caddy/GeoLite2-Country.mmdb" allow_countries DE TR # Germany and Turkey } not remote_ip 127.0.0.1 # Localhost not remote_ip ::1 # Localhost not remote_ip 10.0.0.0/8 # PrivateNetwork not remote_ip 100.64.0.0/10 # PrivateNetwork not remote_ip 127.0.0.0/8 # PrivateNetwork not remote_ip 172.16.0.0/12 # PrivateNetwork not remote_ip 192.168.0.0/16 # PrivateNetwork }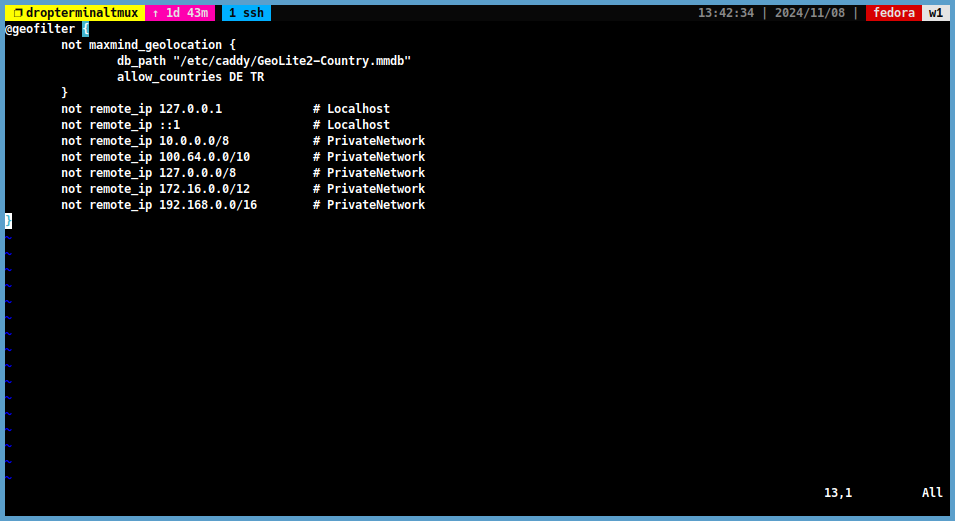
Note
If you are using CloudFlare proxy, you should add the CloudFlare IP ranges to the
Geofilterfile.
For example:not remote_ip 103.21.244.0/22 # CloudFlare not remote_ip 103.22.200.0/22 # CloudFlare not remote_ip 103.31.4.0/22 # CloudFlare not remote_ip 104.16.0.0/13 # CloudFlare not remote_ip 104.24.0.0/14 # CloudFlare not remote_ip 108.162.192.0/18 # CloudFlare not remote_ip 131.0.72.0/22 # CloudFlare not remote_ip 141.101.64.0/18 # CloudFlare not remote_ip 162.158.0.0/15 # CloudFlare not remote_ip 172.64.0.0/13 # CloudFlare not remote_ip 173.245.48.0/20 # CloudFlare not remote_ip 188.114.96.0/20 # CloudFlare not remote_ip 190.93.240.0/20 # CloudFlare not remote_ip 197.234.240.0/22 # CloudFlare not remote_ip 198.41.128.0/17 # CloudFlare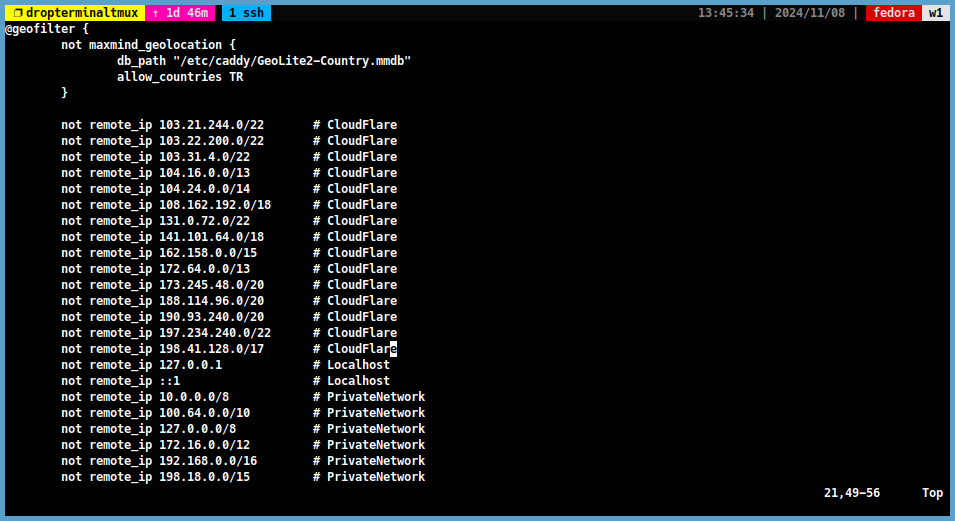
-
If you want to display a custom error page for blocked countries, you can add the following lines to the end of the
Geofilterfileheader @geofilter Content-Type text/html respond @geofilter <<HTML <html> <head><title>Blocked</title></head> <body><img src="https://http.cat/401" alt="blocked"/></body> </html> HTML 401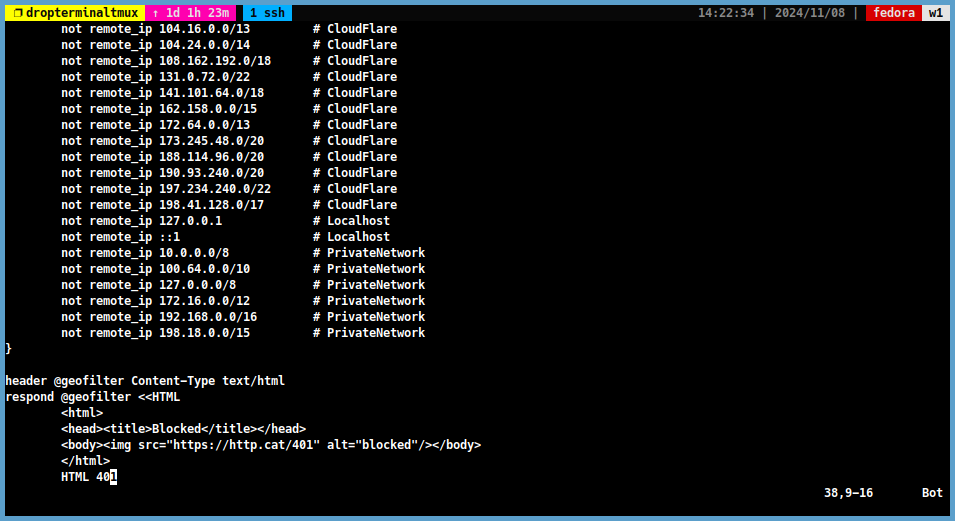
-
Then save this file and open the
Caddyfileagain.sudo vim /etc/caddy/Caddyfile -
Add the following line to the
Caddyfile:yourdomain.com { ... import geofilter # Import the Geofilter ... }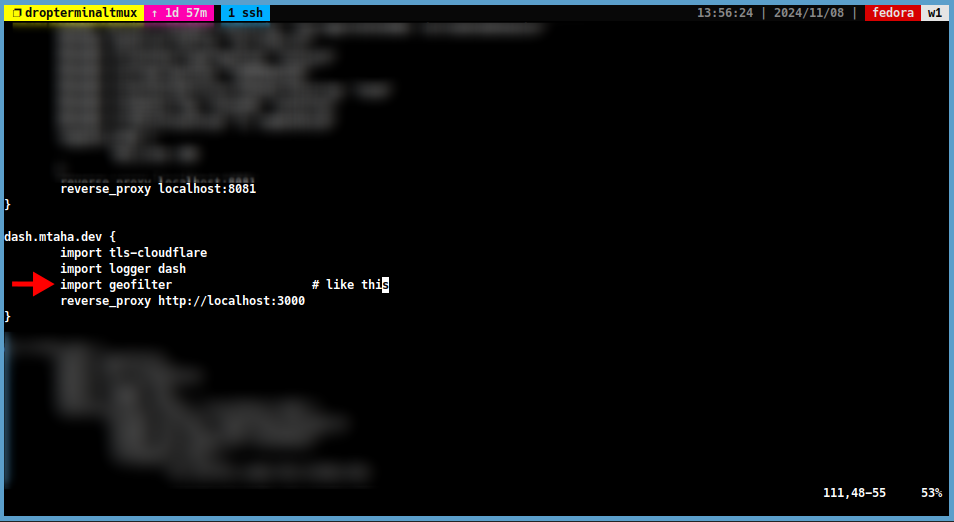
-
Then save this file and restart Caddy.
sudo systemctl restart caddy
Step 4: Test the GeoIP Filtering for Caddy
-
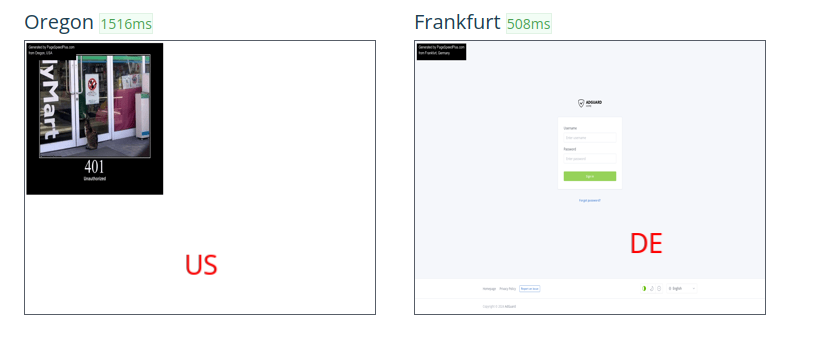
If you have a another server in a blocked country or if you have a VPN, you can test the GeoIP filtering by accessing your domain. I tested it with this tool.
-
Result:
Step 5: Set Up Cronjob for GeoIP Database Update
-
We can create a cronjob to automatically update the GeoLite2 database.
-
Create a new file named
geoupdate.shin the/usr/local/bindirectory.sudo vim /usr/local/bin/geoupdate.sh -
Add the following lines to the file.
#!/bin/bash
wget -O /etc/caddy/GeoLite2-Country.mmdb https://github.com/P3TERX/GeoLite.mmdb/raw/download/GeoLite2-Country.mmdb
[[ "$?" == "0" ]] && systemctl restart caddy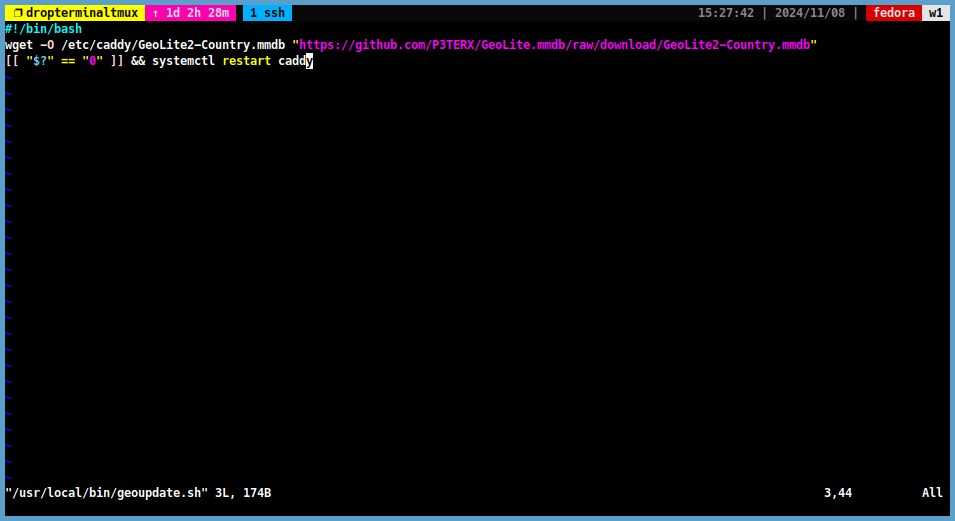
-
Then save the file and make it executable.
sudo chmod +x /usr/local/bin/geoupdate.sh -
Test the script by running it manually.
sudo /usr/local/bin/geoupdate.sh -
Then check the GeoLite2 database file.
stat /etc/caddy/GeoLite2-Country.mmdb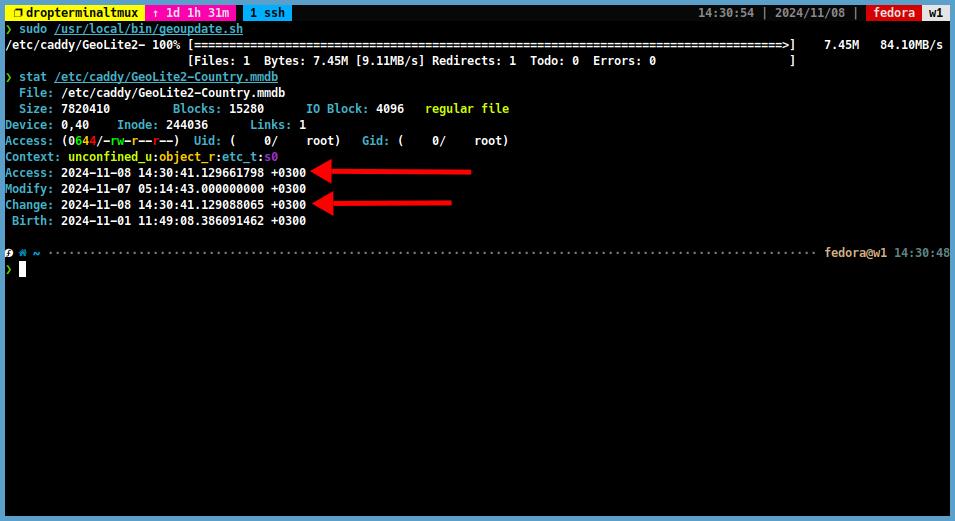
-
If the script runs successfully, we can add it to the crontab.
sudo crontab -e -
Add the following line to the crontab.
0 0 * * SUN /usr/local/bin/geoupdate.shTip
This line will update the GeoLite2 database every Sunday at midnight.
Step 6: Select countries to Allow With FirewallD
-
The methods described up to this step apply to HTTPS connections. However, we cannot always use HTTPS connections. For example, if we are using a DNS server, we need to use port 53 independently of the Caddy. Or we need to use port 22 for SSH connections. We can use the blocking method through firewalld to block requests to the server port.
-
I prefer the ipdeny database this step.
-
Copy the links to the database files for the countries you want to authorise. Then download these databases using the following command:
Note
I will use the Deutschland and Türkiye databases as an example.
wget <copied_url>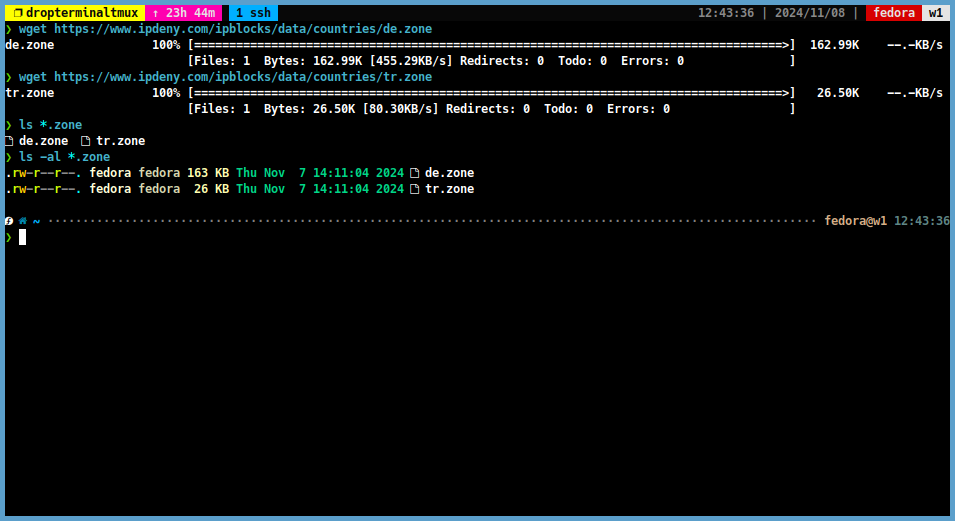
Step 7: Set Up FirewallD for GeoIP Filtering
-
We don’t want to refuse connections from local addresses. So we create a new file called
local.zone.vim local.zone -
Then we add the following lines to the
local.zonefile.10.0.0.0/8 100.64.0.0/10 127.0.0.0/8 172.16.0.0/12 192.168.0.0/16 -
Then we create a new ipset for the allowed countries.
sudo firewall-cmd --permanent --new-ipset='ALLOWLIST' --type=hash:net --option=family=inet --option=hashsize=4096 --option=maxelem=200000 -
We add the local addresses to the
ALLOWLISTipset.sudo firewall-cmd --permanent --ipset='ALLOWLIST' --add-entries-from-file=local.zone # Local addresses sudo firewall-cmd --permanent --ipset='ALLOWLIST' --add-entries-from-file=de.zone # Deutschland sudo firewall-cmd --permanent --ipset='ALLOWLIST' --add-entries-from-file=tr.zone # Türkiye -
Then we create a new rich rule to allow a server port for the ALLOWLIST ipset.
# SSH sudo firewall-cmd --permanent --add-rich-rule='rule family="ipv4" source ipset=ALLOWLIST port port="22" protocol="tcp" accept' # DNS sudo firewall-cmd --permanent --add-rich-rule='rule family="ipv4" source ipset=ALLOWLIST port port="53" protocol="tcp" accept' sudo firewall-cmd --permanent --add-rich-rule='rule family="ipv4" source ipset=ALLOWLIST port port="53" protocol="udp" accept' # QUIC sudo firewall-cmd --permanent --add-rich-rule='rule family="ipv4" source ipset=ALLOWLIST port port="853" protocol="tcp" accept' sudo firewall-cmd --permanent --add-rich-rule='rule family="ipv4" source ipset=ALLOWLIST port port="853" protocol="udp" accept' -
Then we reload the firewall.
sudo firewall-cmd --reload -
We can test these rules by sending a telnet command to another server that is located in a country that is not allowed (or we can use a VPN).
telnet <server_ip> 22           # SSH
telnet <server_ip> 53           # DNS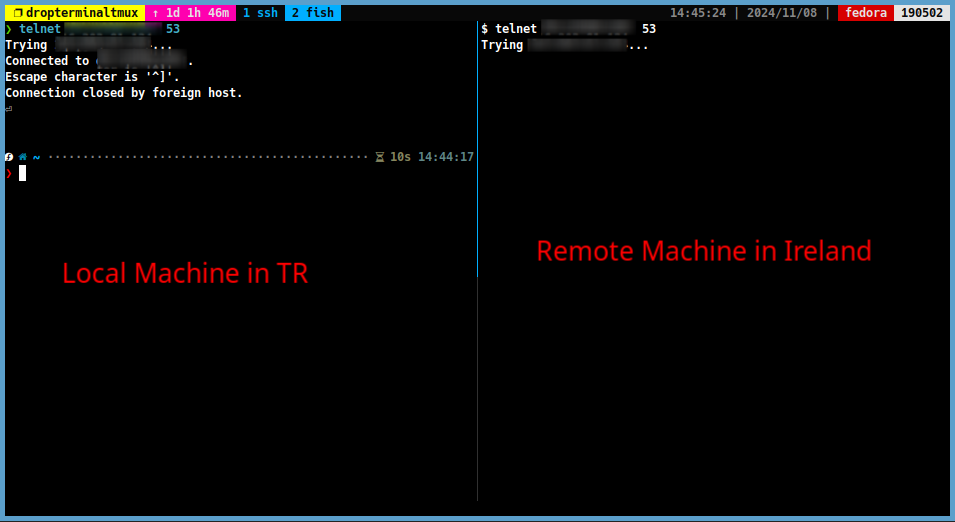
What is the difference between blocking between Caddy and FirewallD?
-
When using FirewallD for blocking, iptables works in the background and handles the blocking process at Layer 4 (transport layer). This means that the request is intercepted and blocked before it reaches the server’s application layer, providing a performance benefit by reducing the load on higher layers.
-
In contrast, when blocking with Caddy, the request proceeds through Layer 4 and reaches Layer 7 (Application Layer), where the application itself decides whether to block the request. Blocking at Layer 7 may consume slightly more resources, but it allows for more granular control, as the decision can be based on application-specific rules. However, it typically requires fewer performance resources for fine-grained control than Layer 4 blocking, especially for certain types of content filtering or geo-restriction.
Conclusion
- By implementing GeoIP filtering, organisations and administrators can limit the risks associated with untrusted regions and better protect their networks from cyber threats. This technology is often used in industries where data security is a priority, such as finance, healthcare and government. GeoIP filtering can be configured on firewalls, routers and specific applications, making it a flexible solution for securing network access based on geographical boundaries.